---
title: "quick-start-guide"
weight: 1
---
## Objective
In this quickstart, as a cluster admin, you will learn how to create workspaces, roles and user accounts, and then invite new users into the workspace to create their projects and DevOps projects. This tutorial is used to help beginners to become familiar with multi-tenant management.
## Prerequisites
- You need to [install KubeSphere](https://kubesphere.io/en/install).
- You need a default admin account.
## Hands-on Lab
Generally, the hierarchy relationship of Cluster, Workspace, Project and DevOps Project showing as the following graph, and there are common built-in roles existed in these orgnizations within each level.

### Cluster Admin
The role of cluster-admin is able to create accounts for other users and assign roles to them. There are three common roles in cluster level, it also supports customizing new roles.
|Built-in Roles|Responsibility|
|---|---|
|cluster-admin|Have the highest privileges for the cluster, can manage any resources|
|workspaces-manager|The workspace managers, can manage all of the resources, e.g. projects, DevOps projects, members and roles |
|cluster-regular| The regular users in the cluster, they are not authorized until they have been invited to the workspace|
#### Step 1: Create roles and accounts
First, we will create a new role (user-manager), grants account management and role management authority to this role, then we will create an account and grant the user-manager role to this account.
|Account Name|Cluster Role|Responsibility|
|---|---|---|
|user-manager|user-manager|Manage cluster accounts and roles|
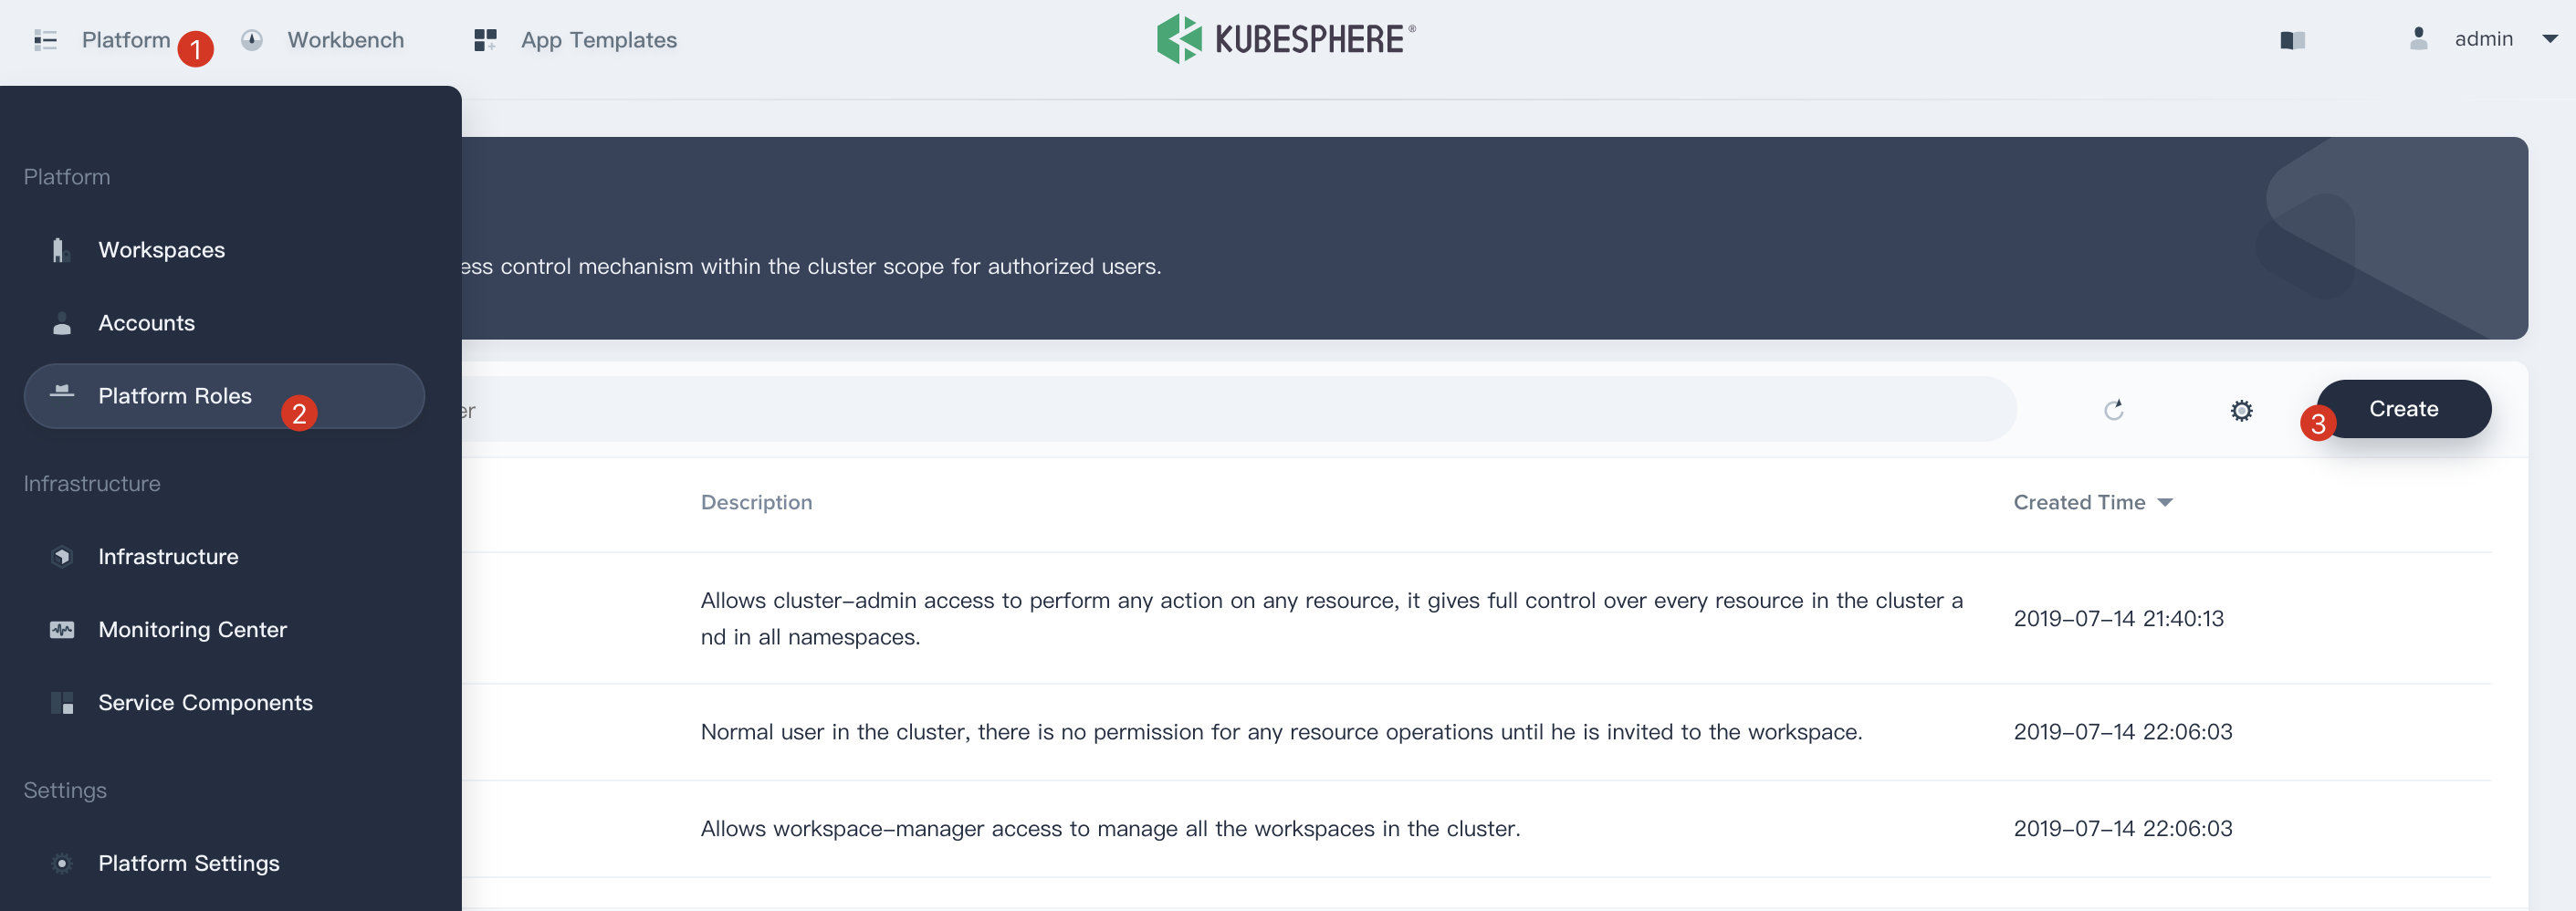
1.1 To get started, login KubeSphere with the `admin` account, click **Platform** and then navigate to **Platform Roles** page, click **Create** to create a role which is used to manage all accounts and roles.
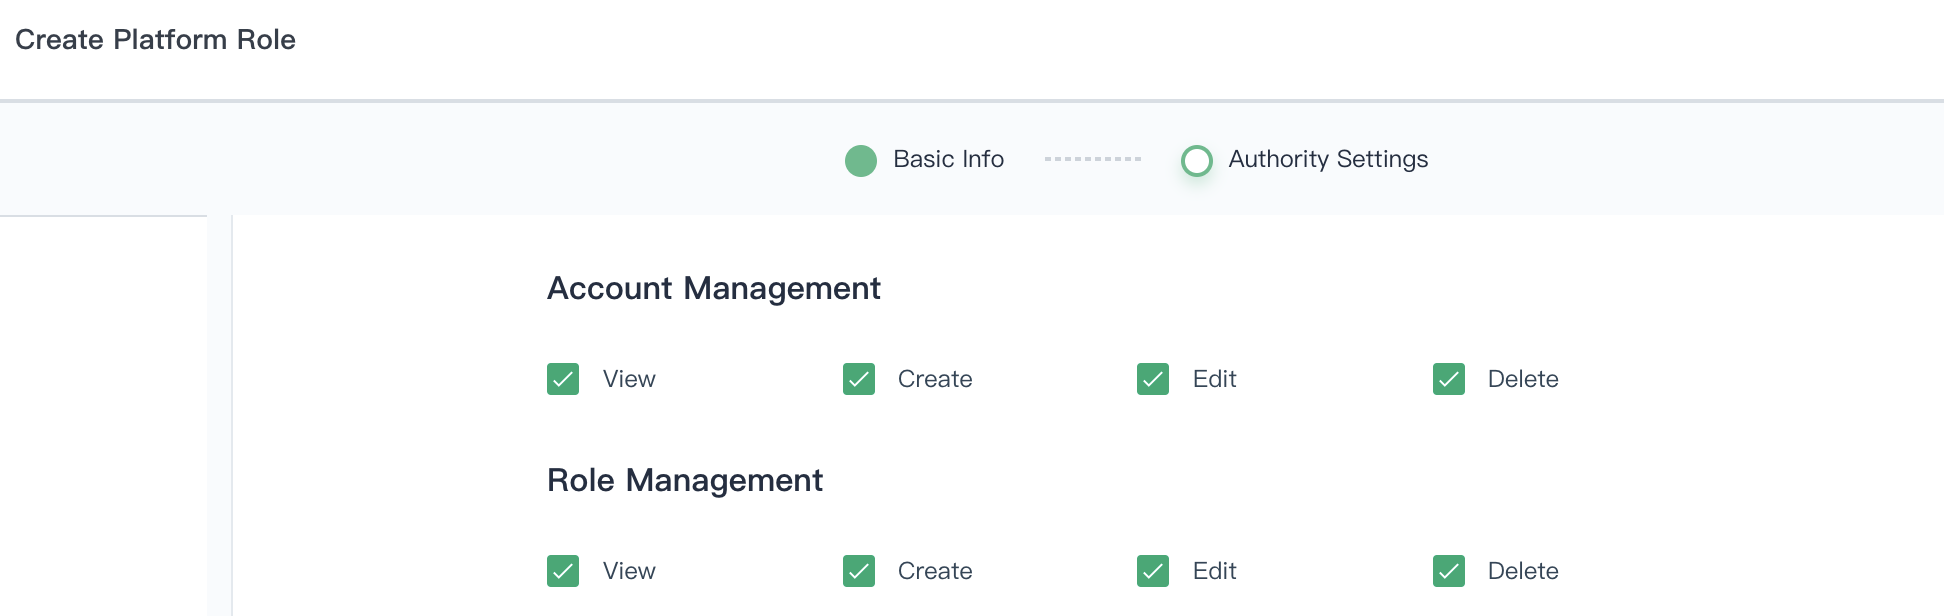
1.2. Fill in the basic information and authority settings of the role, e.g. `Name : user-manager`.
1.3. Check all the boxes for both **Account Management** and **Role Management**, then click **Create**.
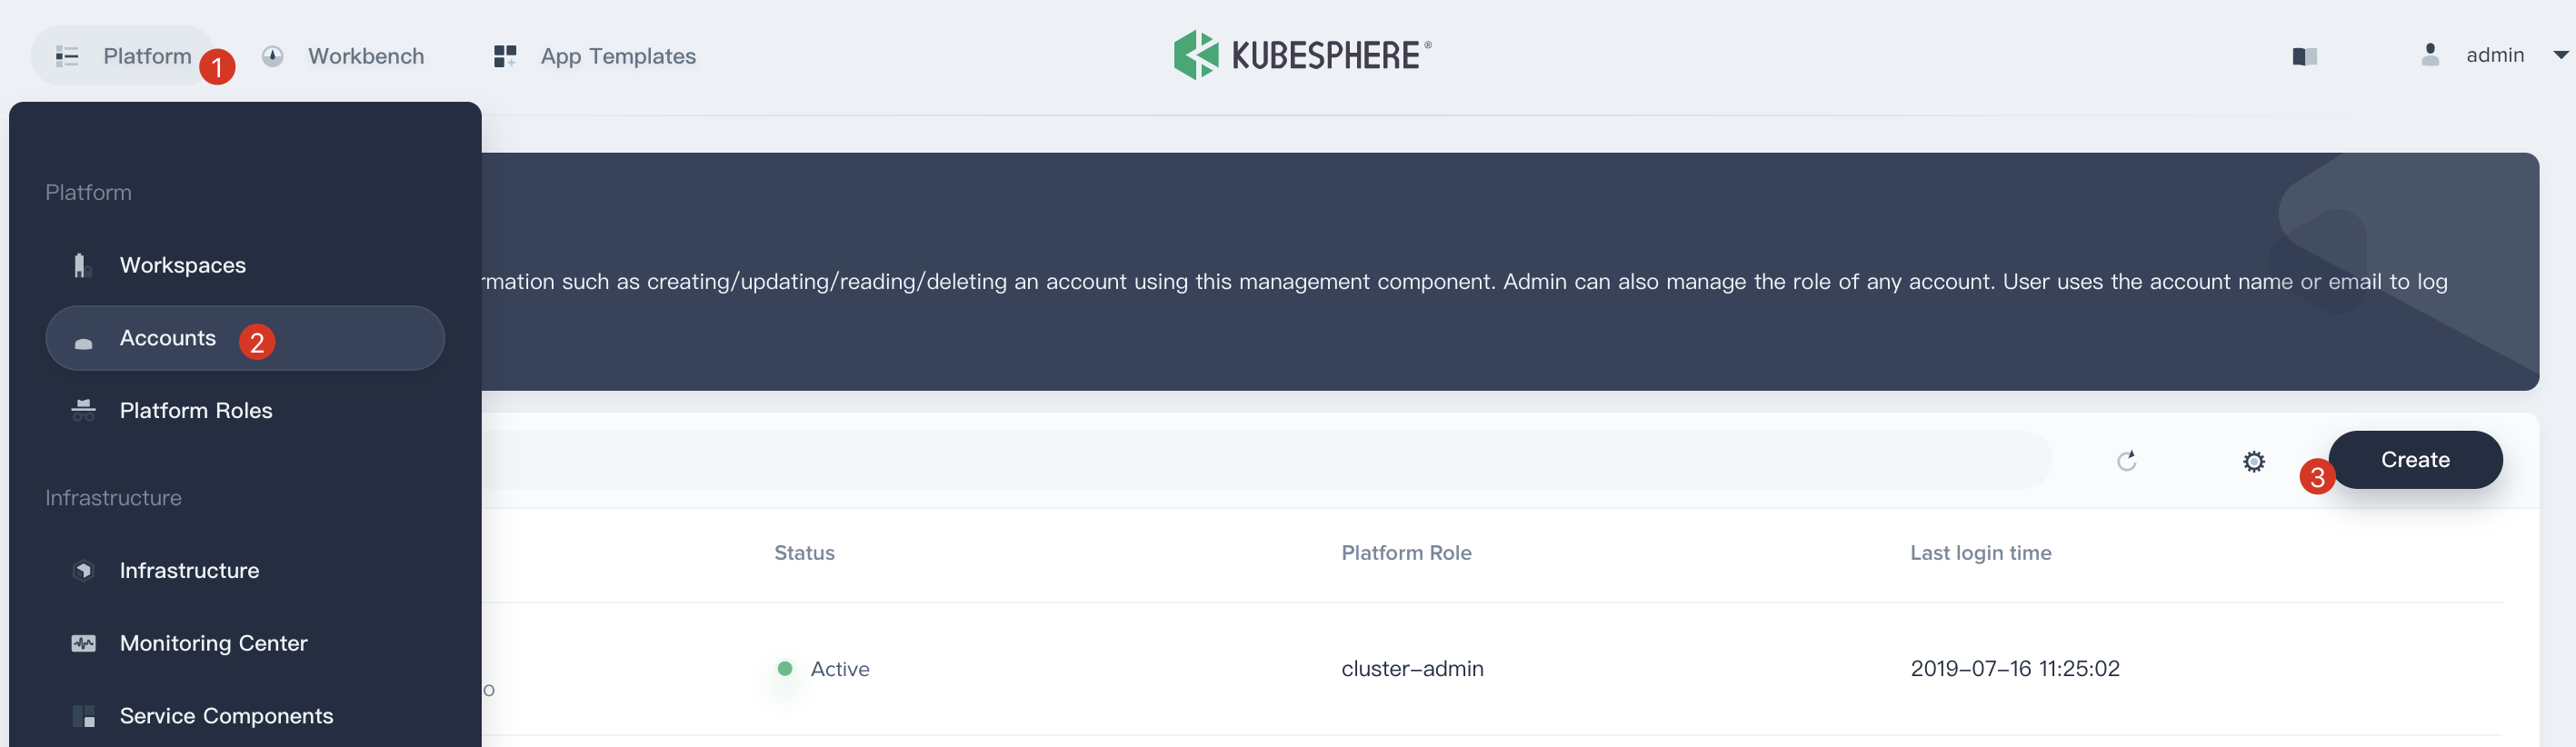
1.4. Click **Platform**, then navigate to **Accounts** page and click **Create** to create an account.
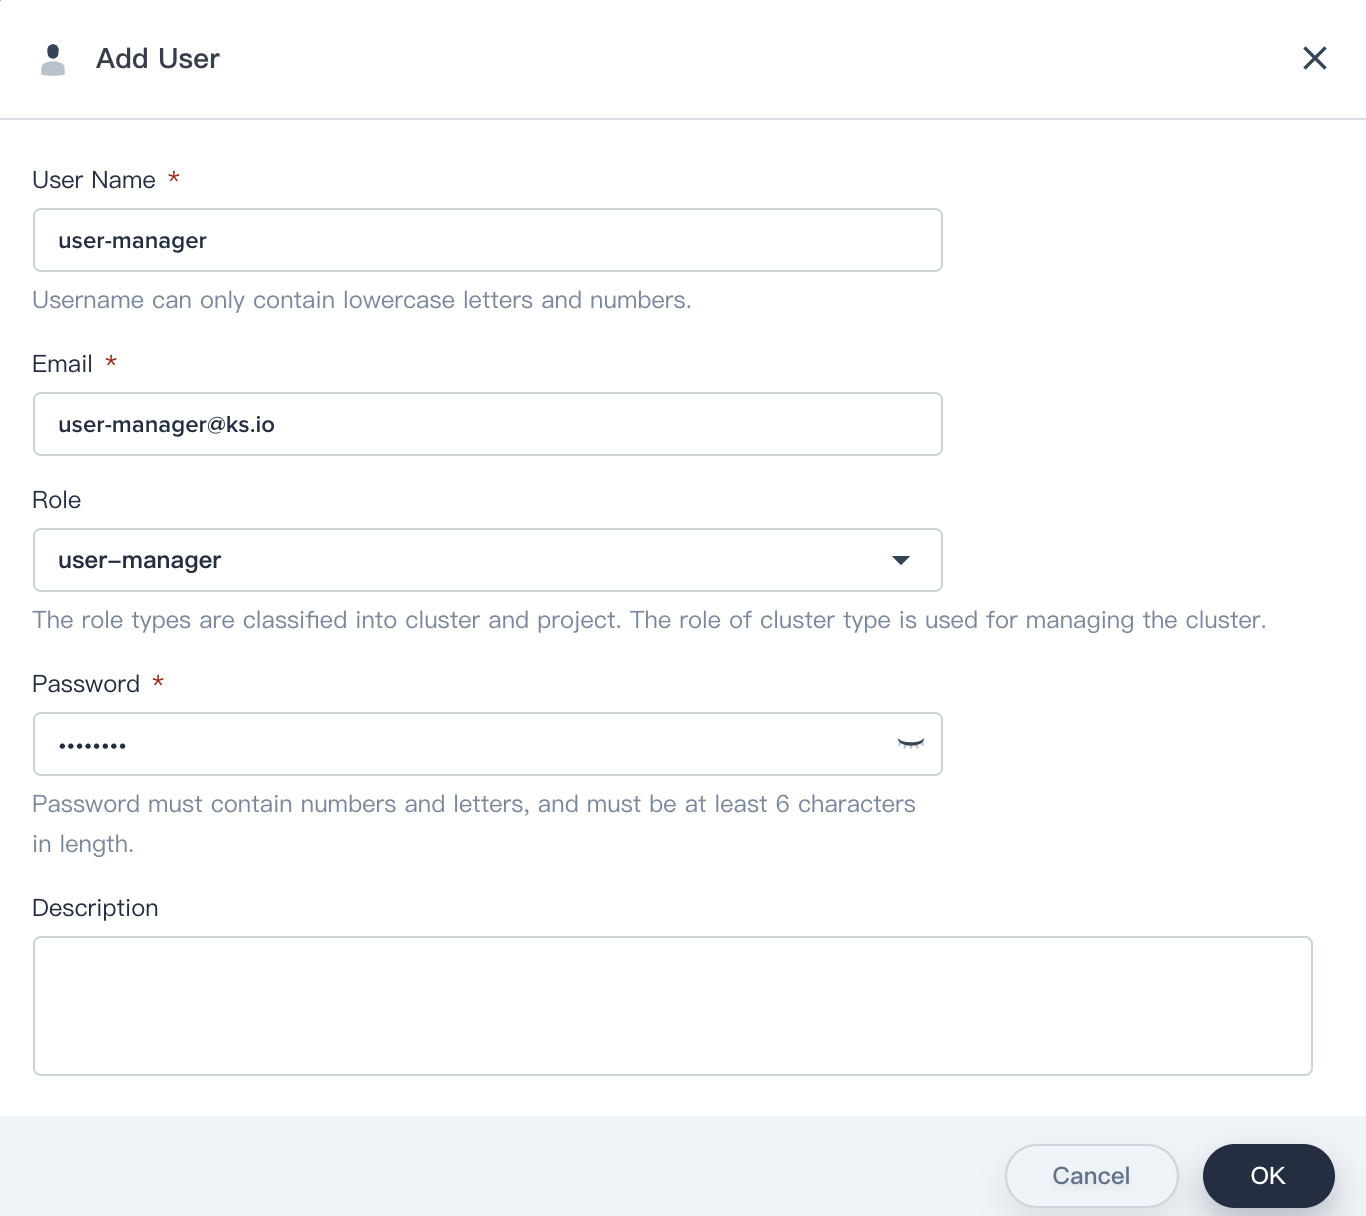
1.5. Fill in the basic information, notice that select `user-manger` as its role.
1.6. Log out and Sign in with the `user-manager` account, then navigate to **Account** and create 4 accounts according to the following table. Please reference the above steps to create these 4 accounts.
|Account Name|Cluster Role|Responsibility|
|---|---|---|
|ws-manager|workspaces-manager|Create and manage all workspaces|
|ws-admin|cluster-regular|Manage all resources under the specified workspace
(This example is used to invite new members to join the workspace.)|
|project-admin|cluster-regular|Create and manage projects, DevOps projects, invite new members|
|project-regular|cluster-regular|The regular user will be invited to the project and DevOps project by the project-admin,
we use this account to create workloads, pipelines and other resources under the specified project|
1.7. Verify the 4 accounts that we created in step 1.6.

### Workspace Admin
#### Step 2: Create a Workspace
Workspace is the base of implementing the multi-tenant mechanism, it's also the base unit for projects and DevOps projects managment.
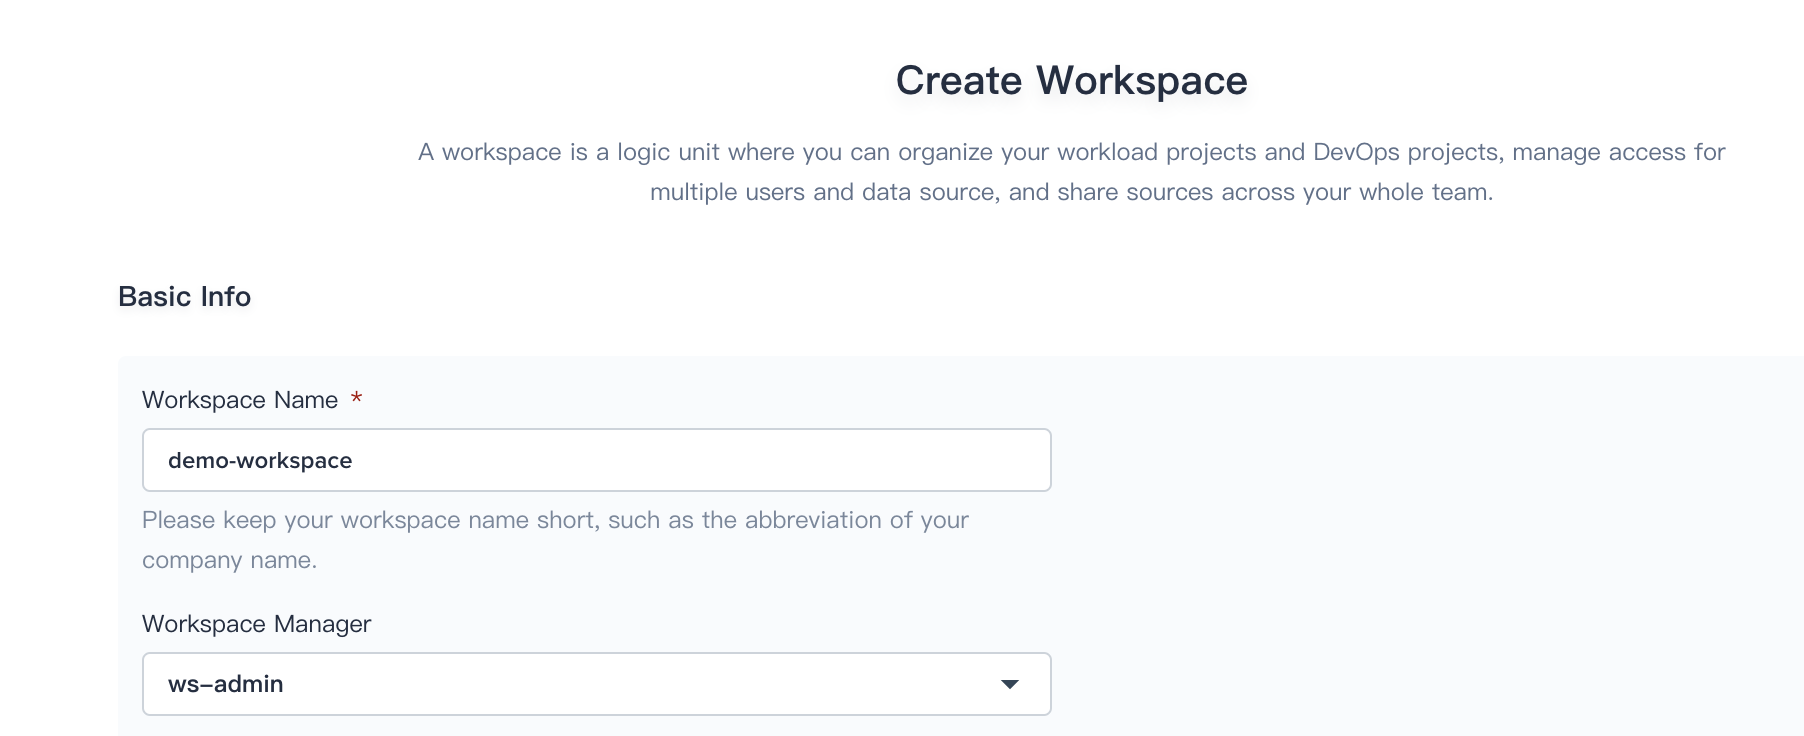
2.1. Sign in with `ws-manager` that we created in Step 1, then click **Workspace** and click **Create Workspace**, name it as demo-workspace and appoint `ws-admin` as Workspace Manager, who has the highest administrative authority of the workspace.
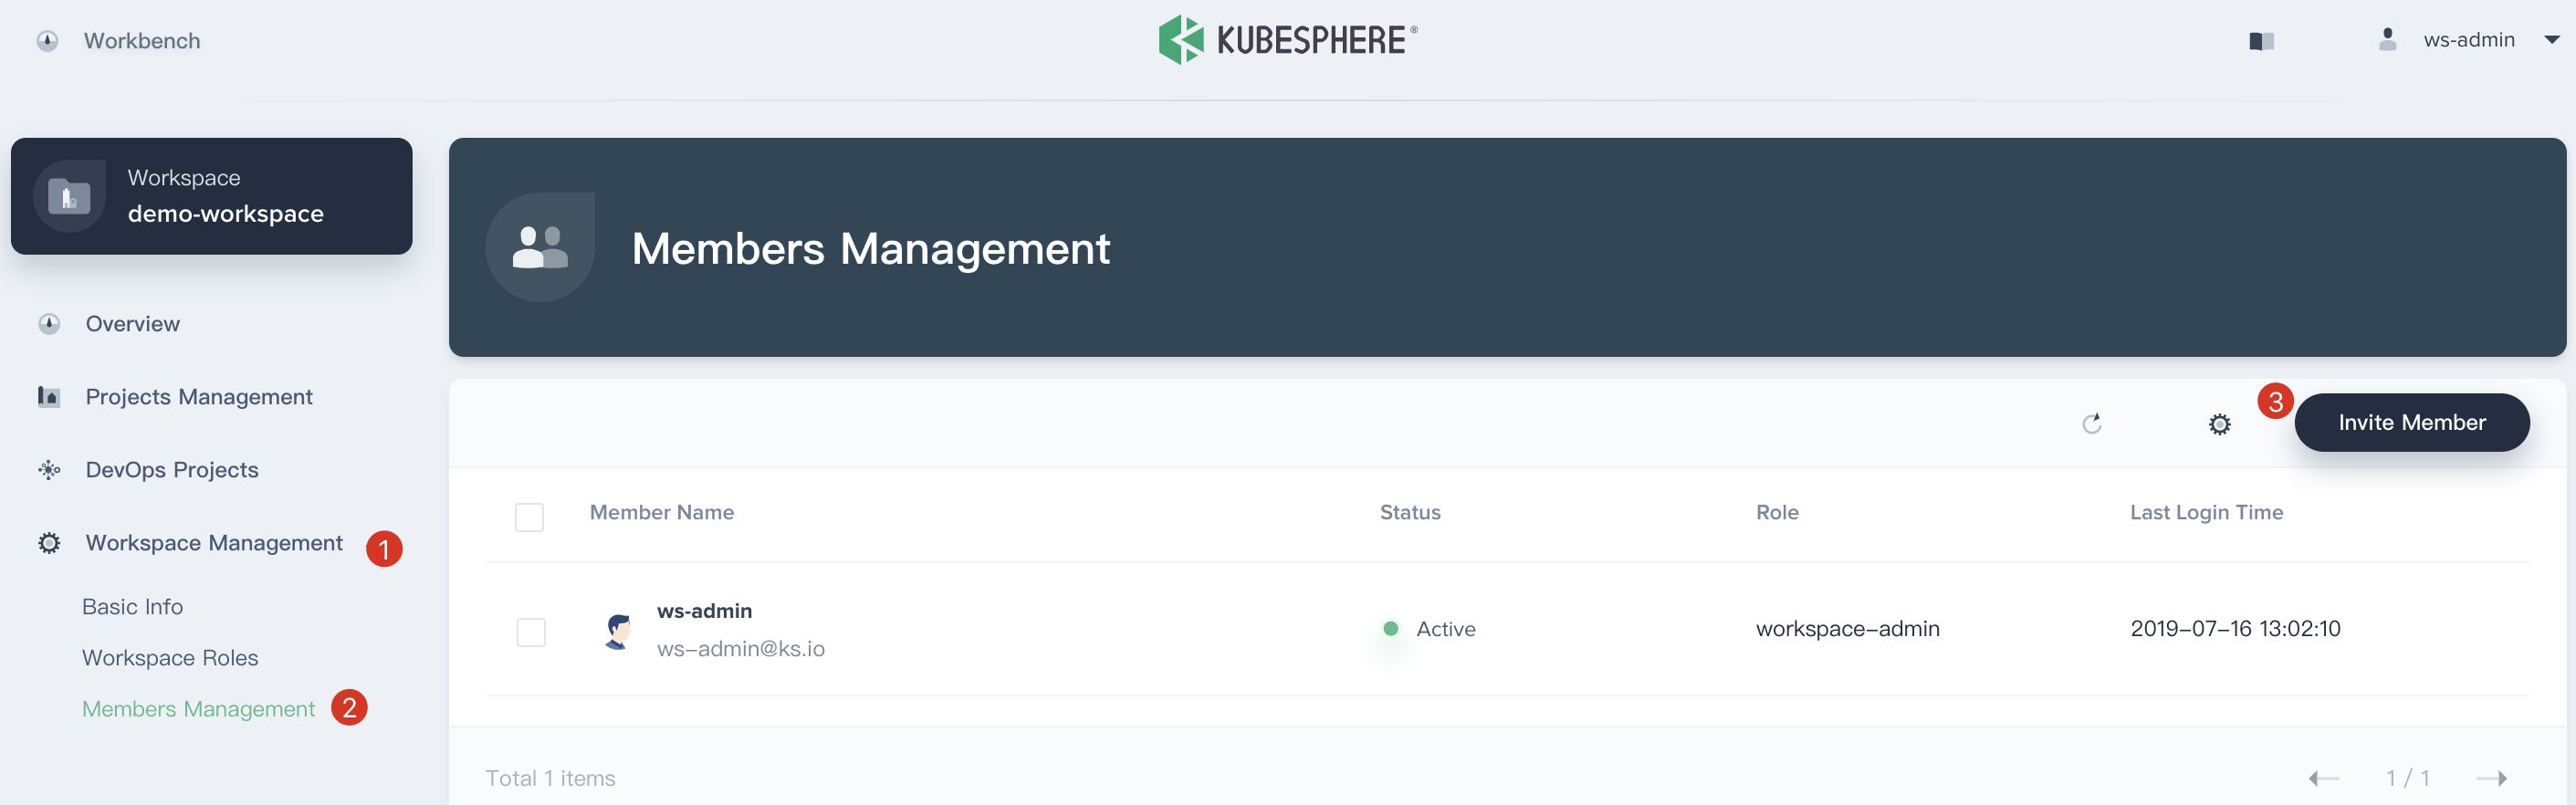
2.2. Logout and sign in with `ws-admin` after `demo-workspace` has been created. Then click **View Workspace**, select **Worksapce Management → Members Management** and click **Invite Member**.
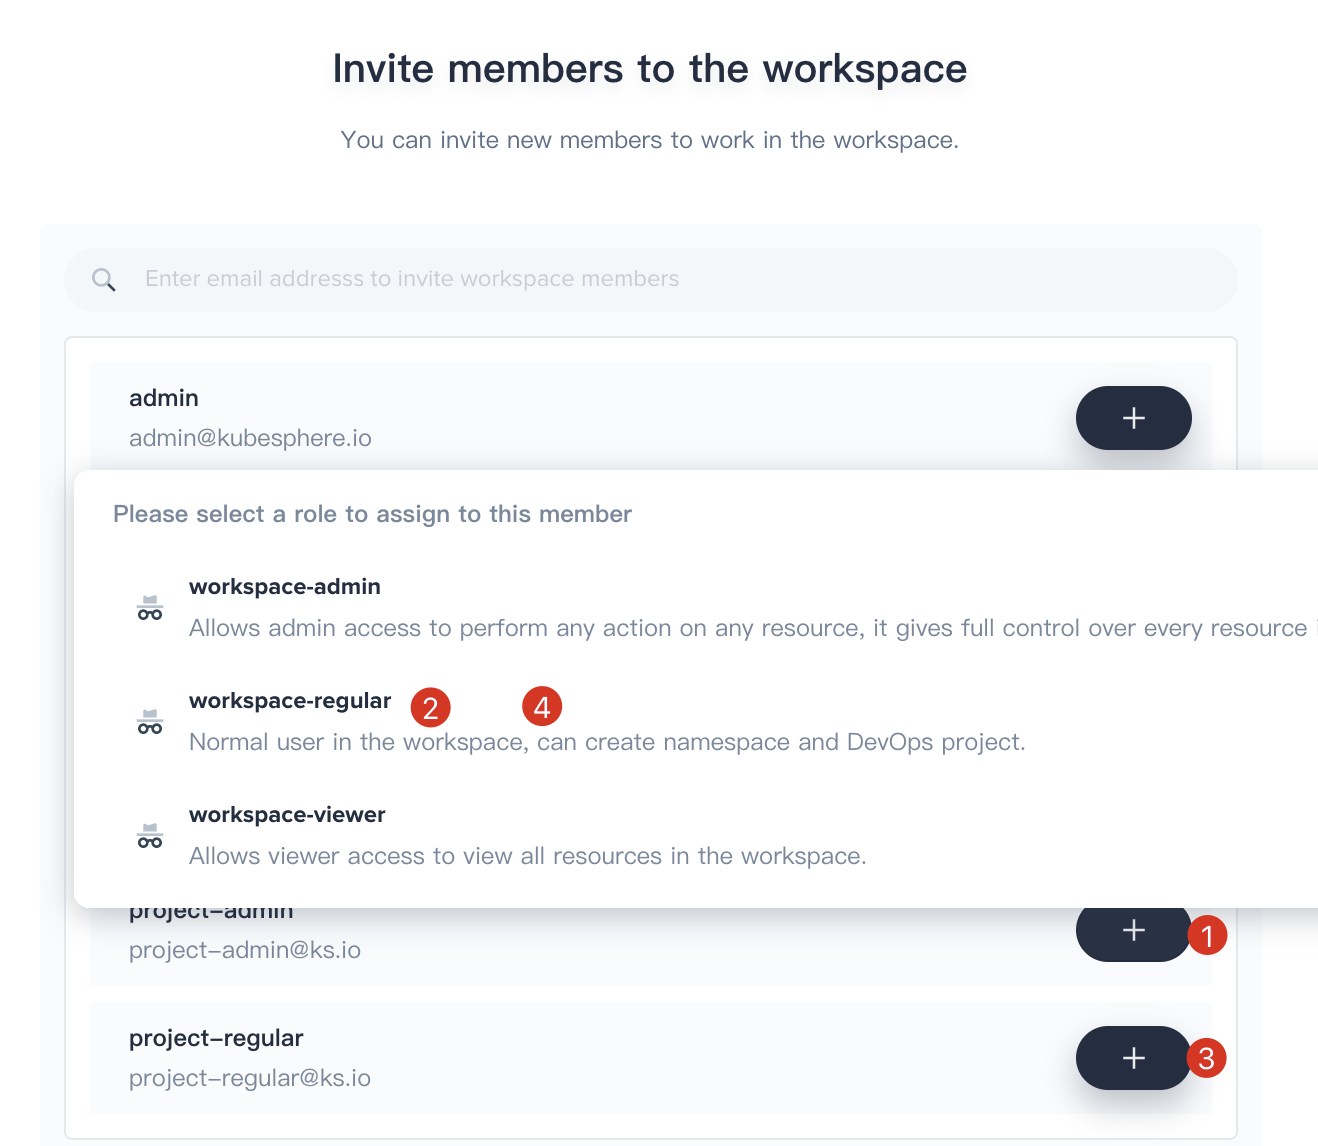
2.3. Invite both `project-admin` and `project-regular` and grant them `workspace-regular` accordingly, click **OK** to save it. Now there are 3 members in the `demo-workspace`.
|User Name|Role in the Workspace|Responsibility|
|---|---|---|
|ws-admin|workspace-admin|Manage all resources under the workspace
(We use this account to invite new members into the workspace)|
|project-admin|workspace-regular|Create and manage projects, DevOps projects, and invite new members to join|
|project-regular|workspace-viewer|Will be invited by project-admin to join the project and DevOps project.
we use this account to create workloads, pipelines, etc|
### Project Admin and DevOps Admin
#### Step 3: Create a Project
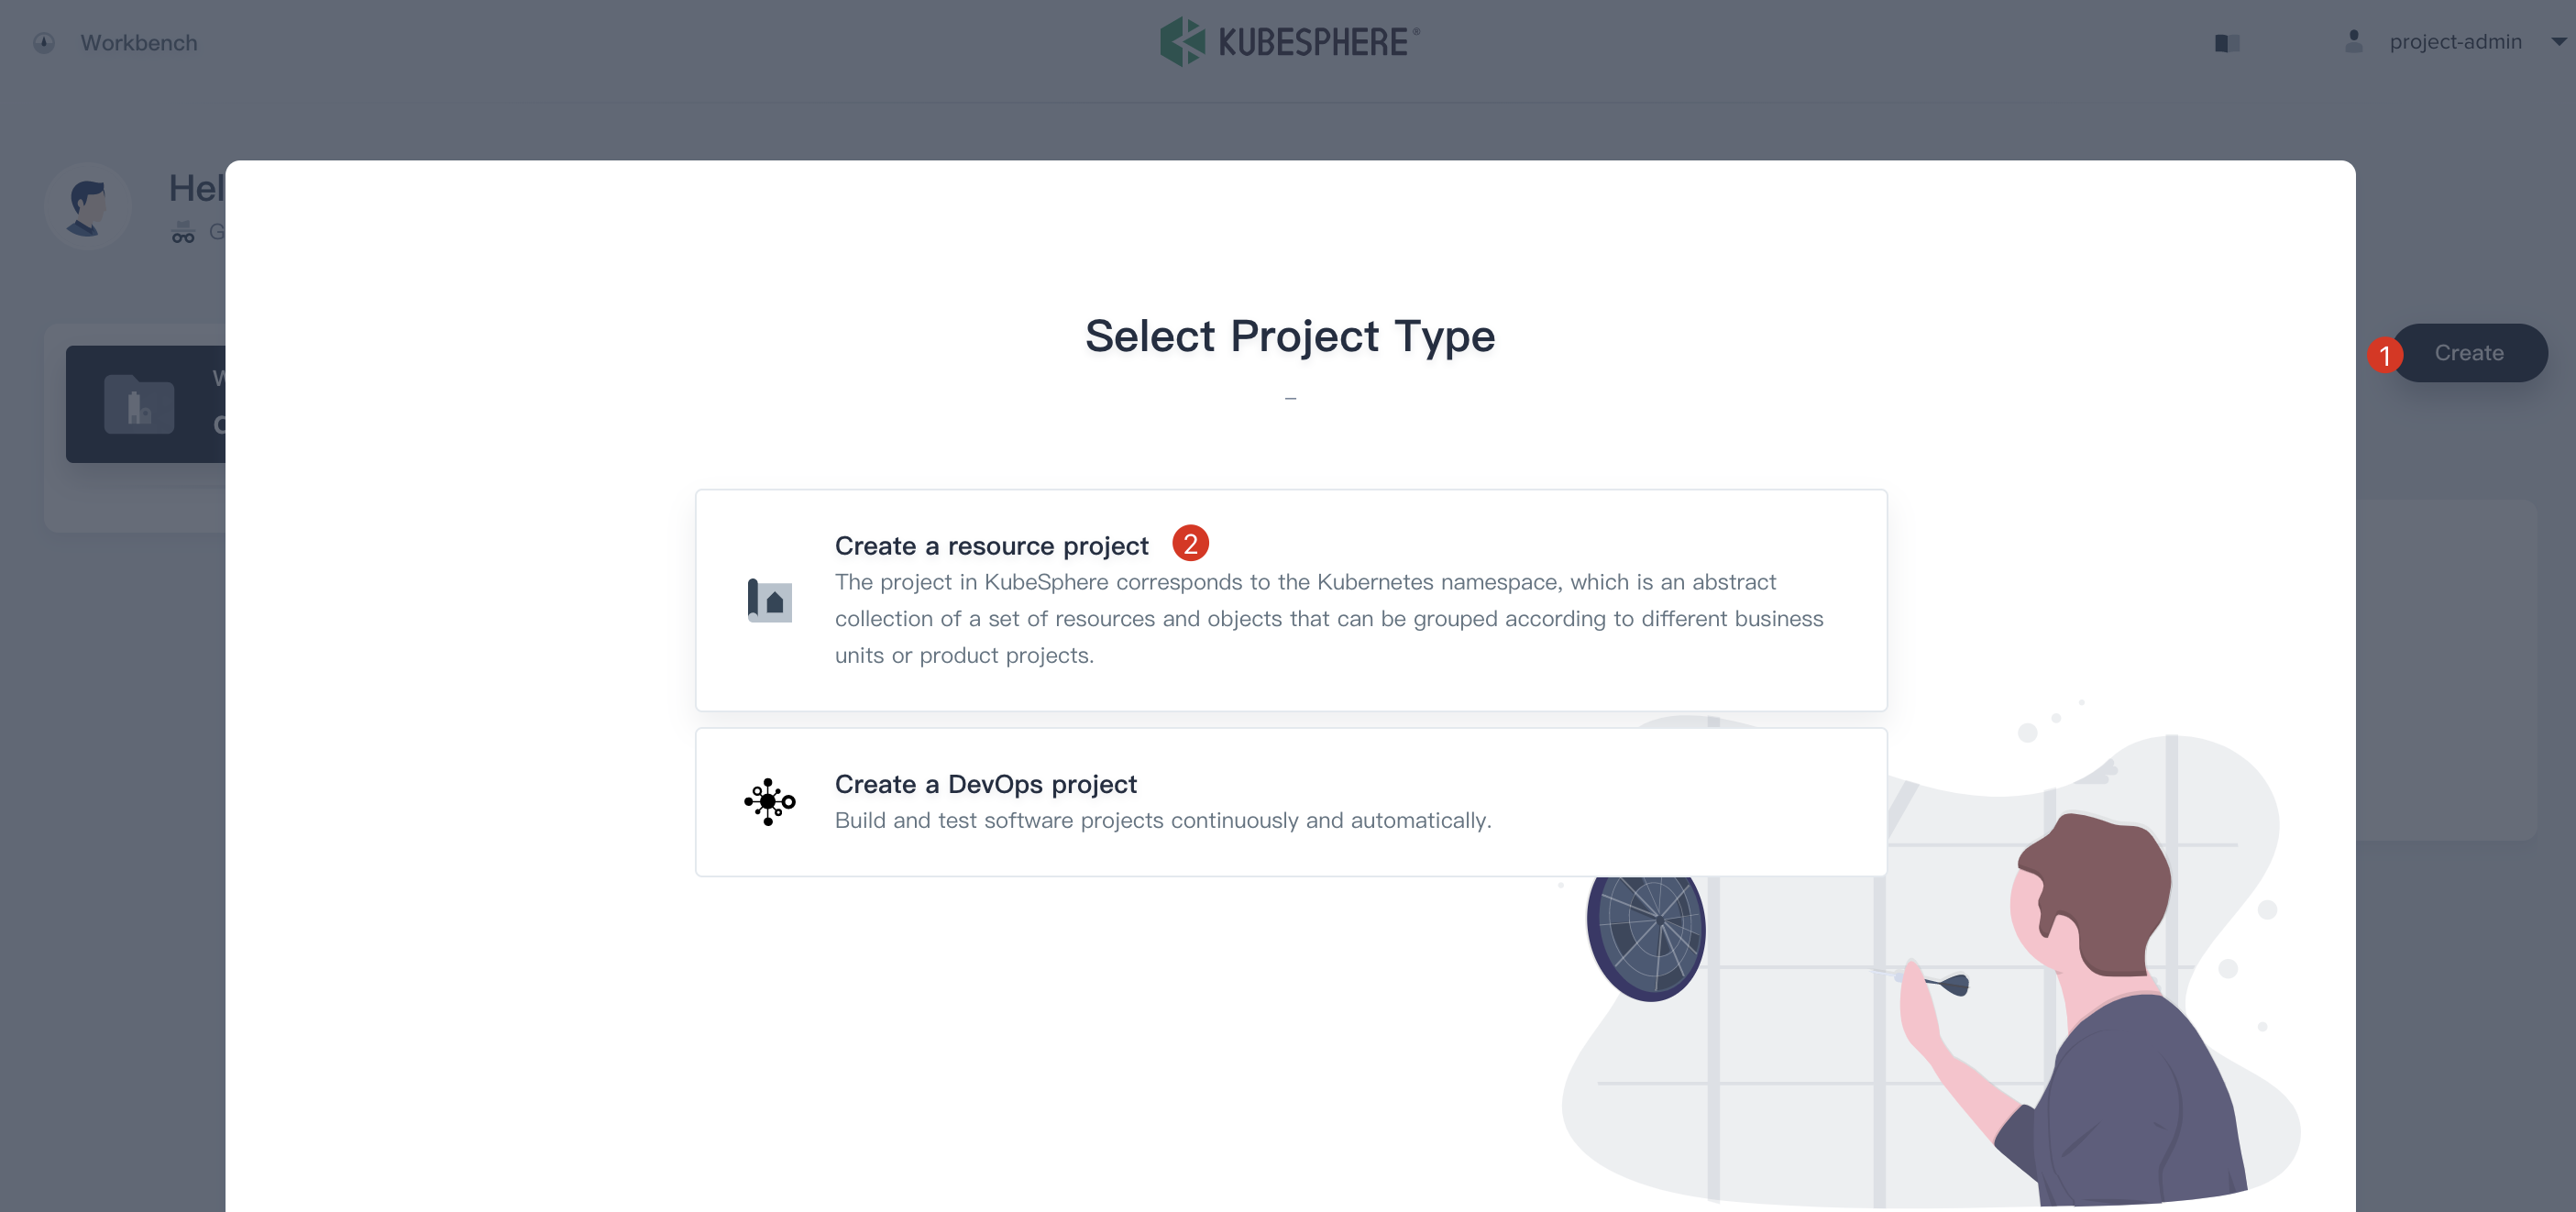
3.1. Sign in with `project-admin` that we created in Step 1, then click **Create** and select **Create a resource project**.
3.2. Name it as `demo-project` and keep the advanced settings as the default values, then click **Create**.
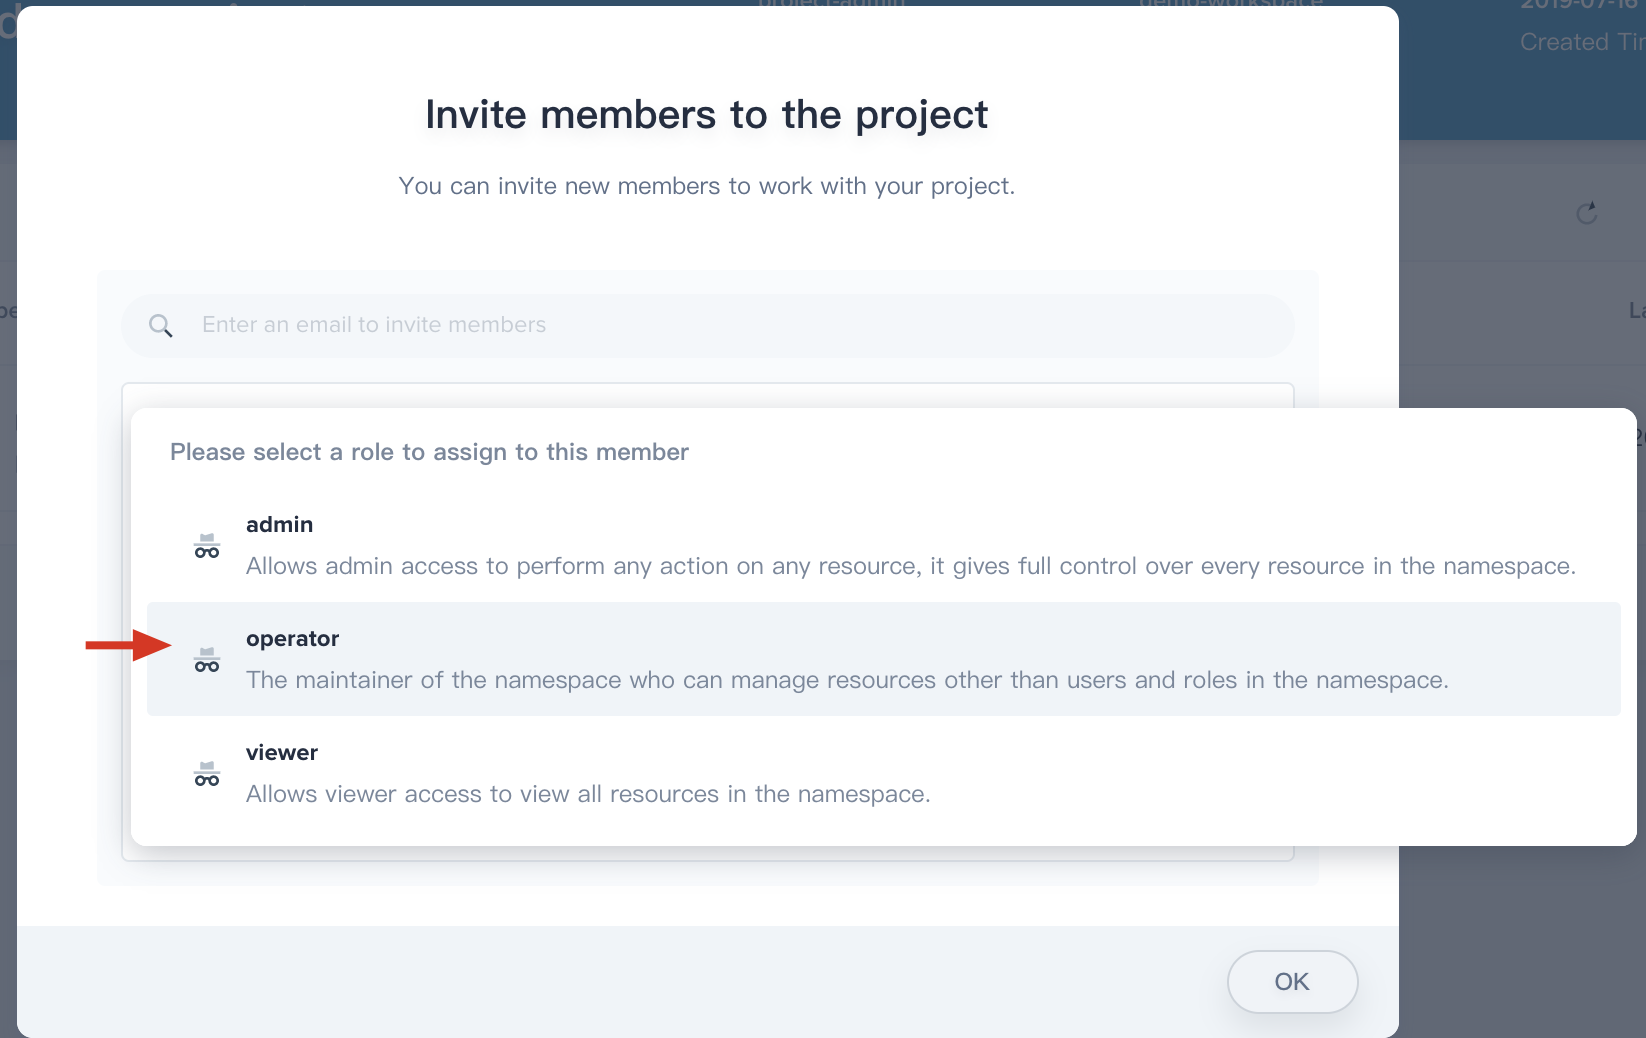
3.3. Choosing **Project Settings → Project Members** and click **Invite Member**.
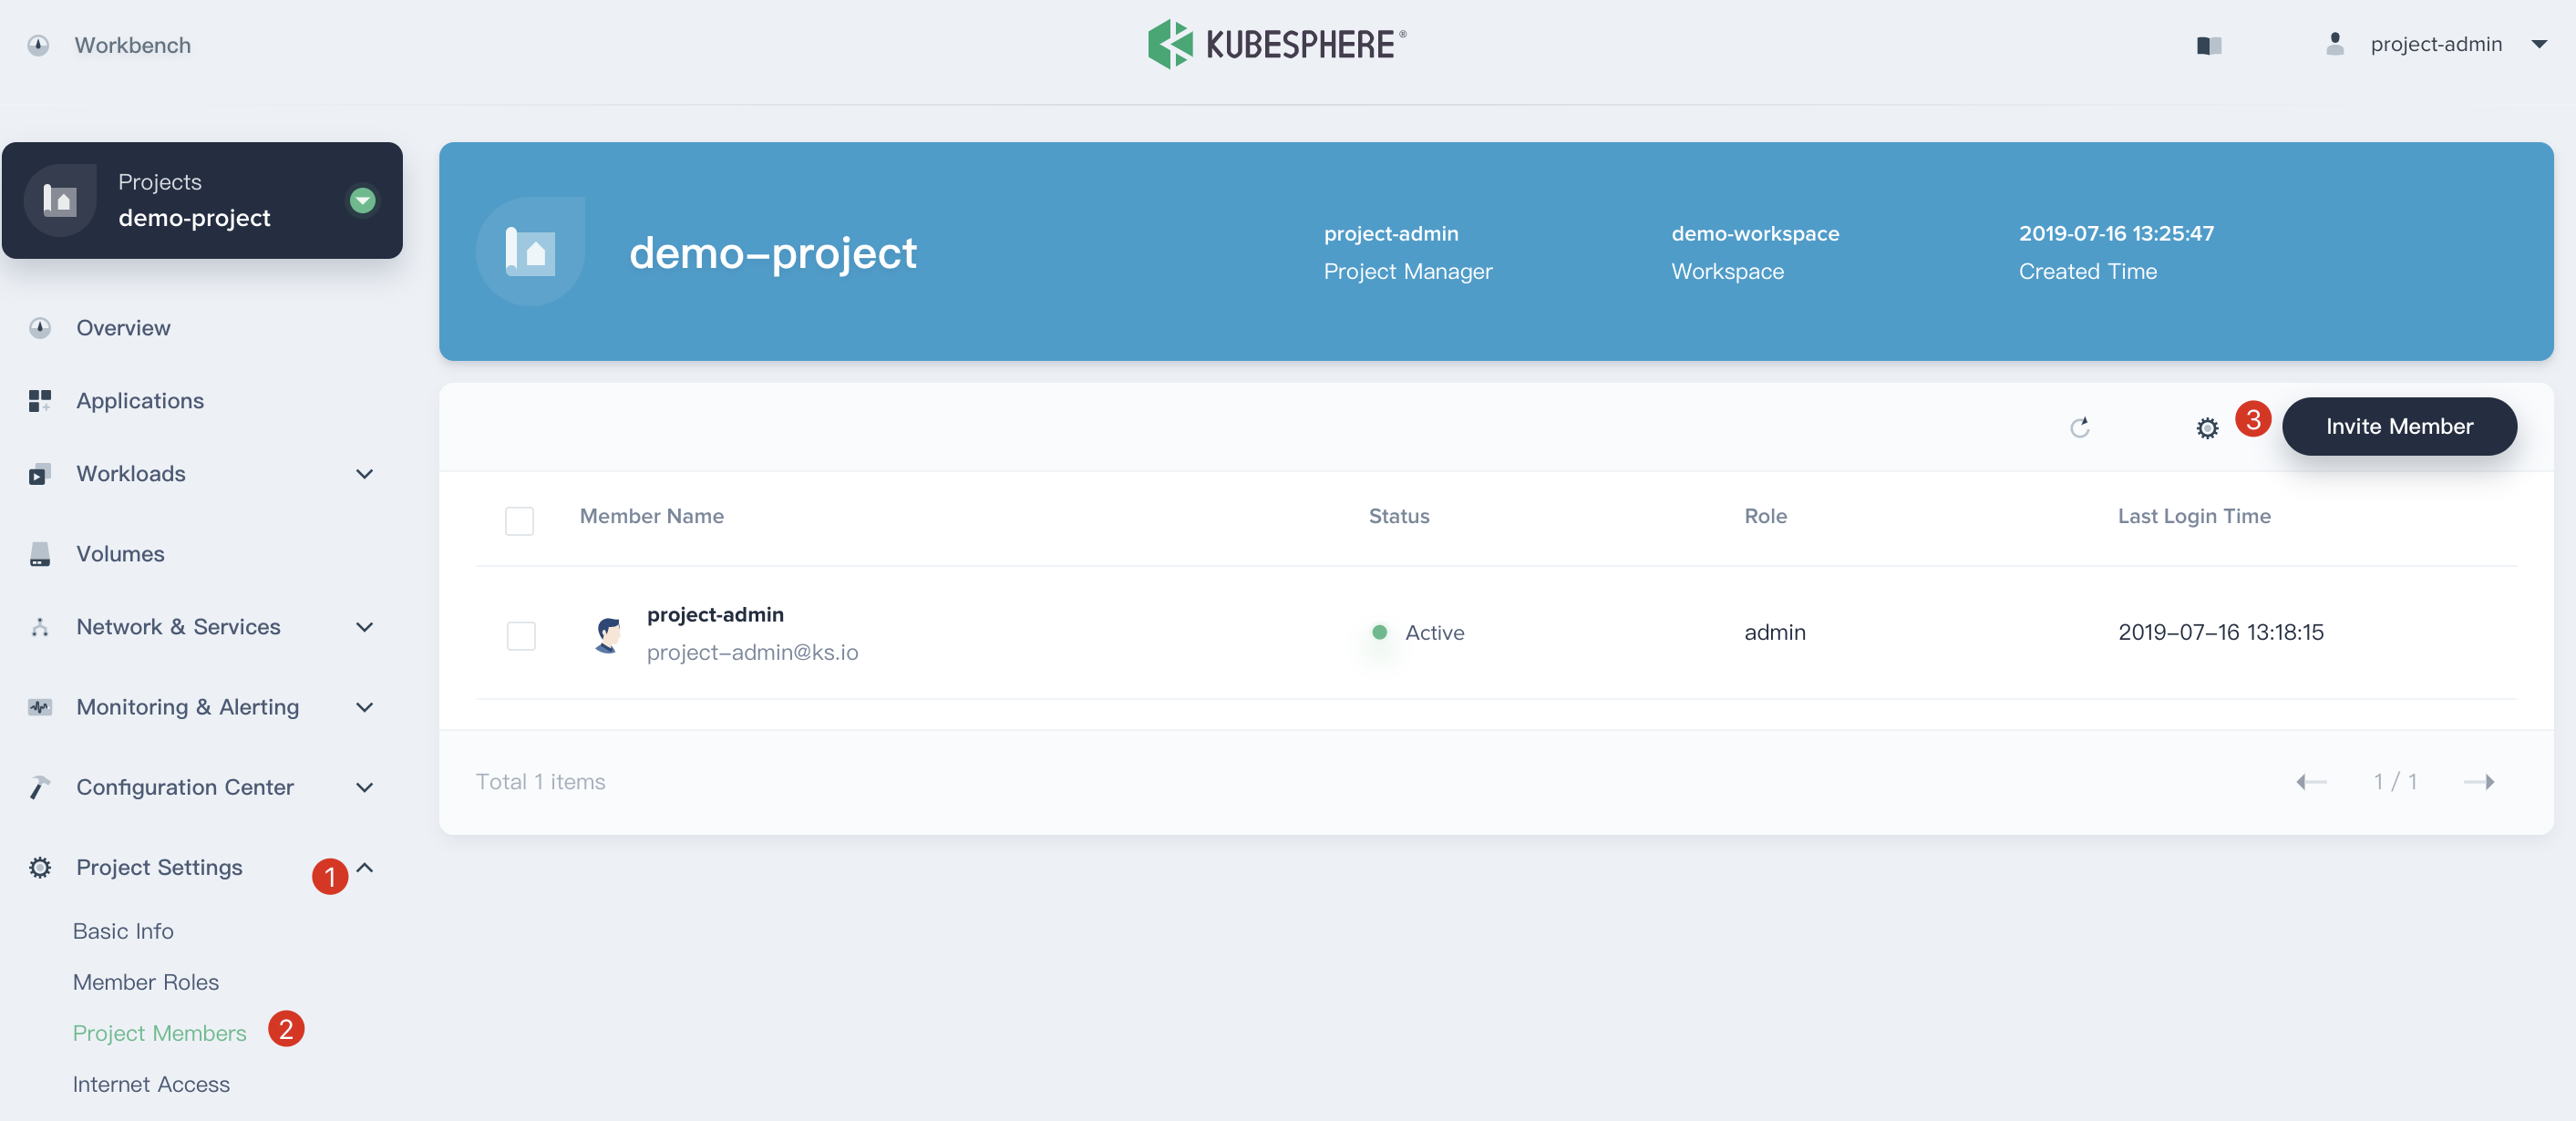
3.4. Invite `project-regular` to this project and grant this user **operator** accordingly.

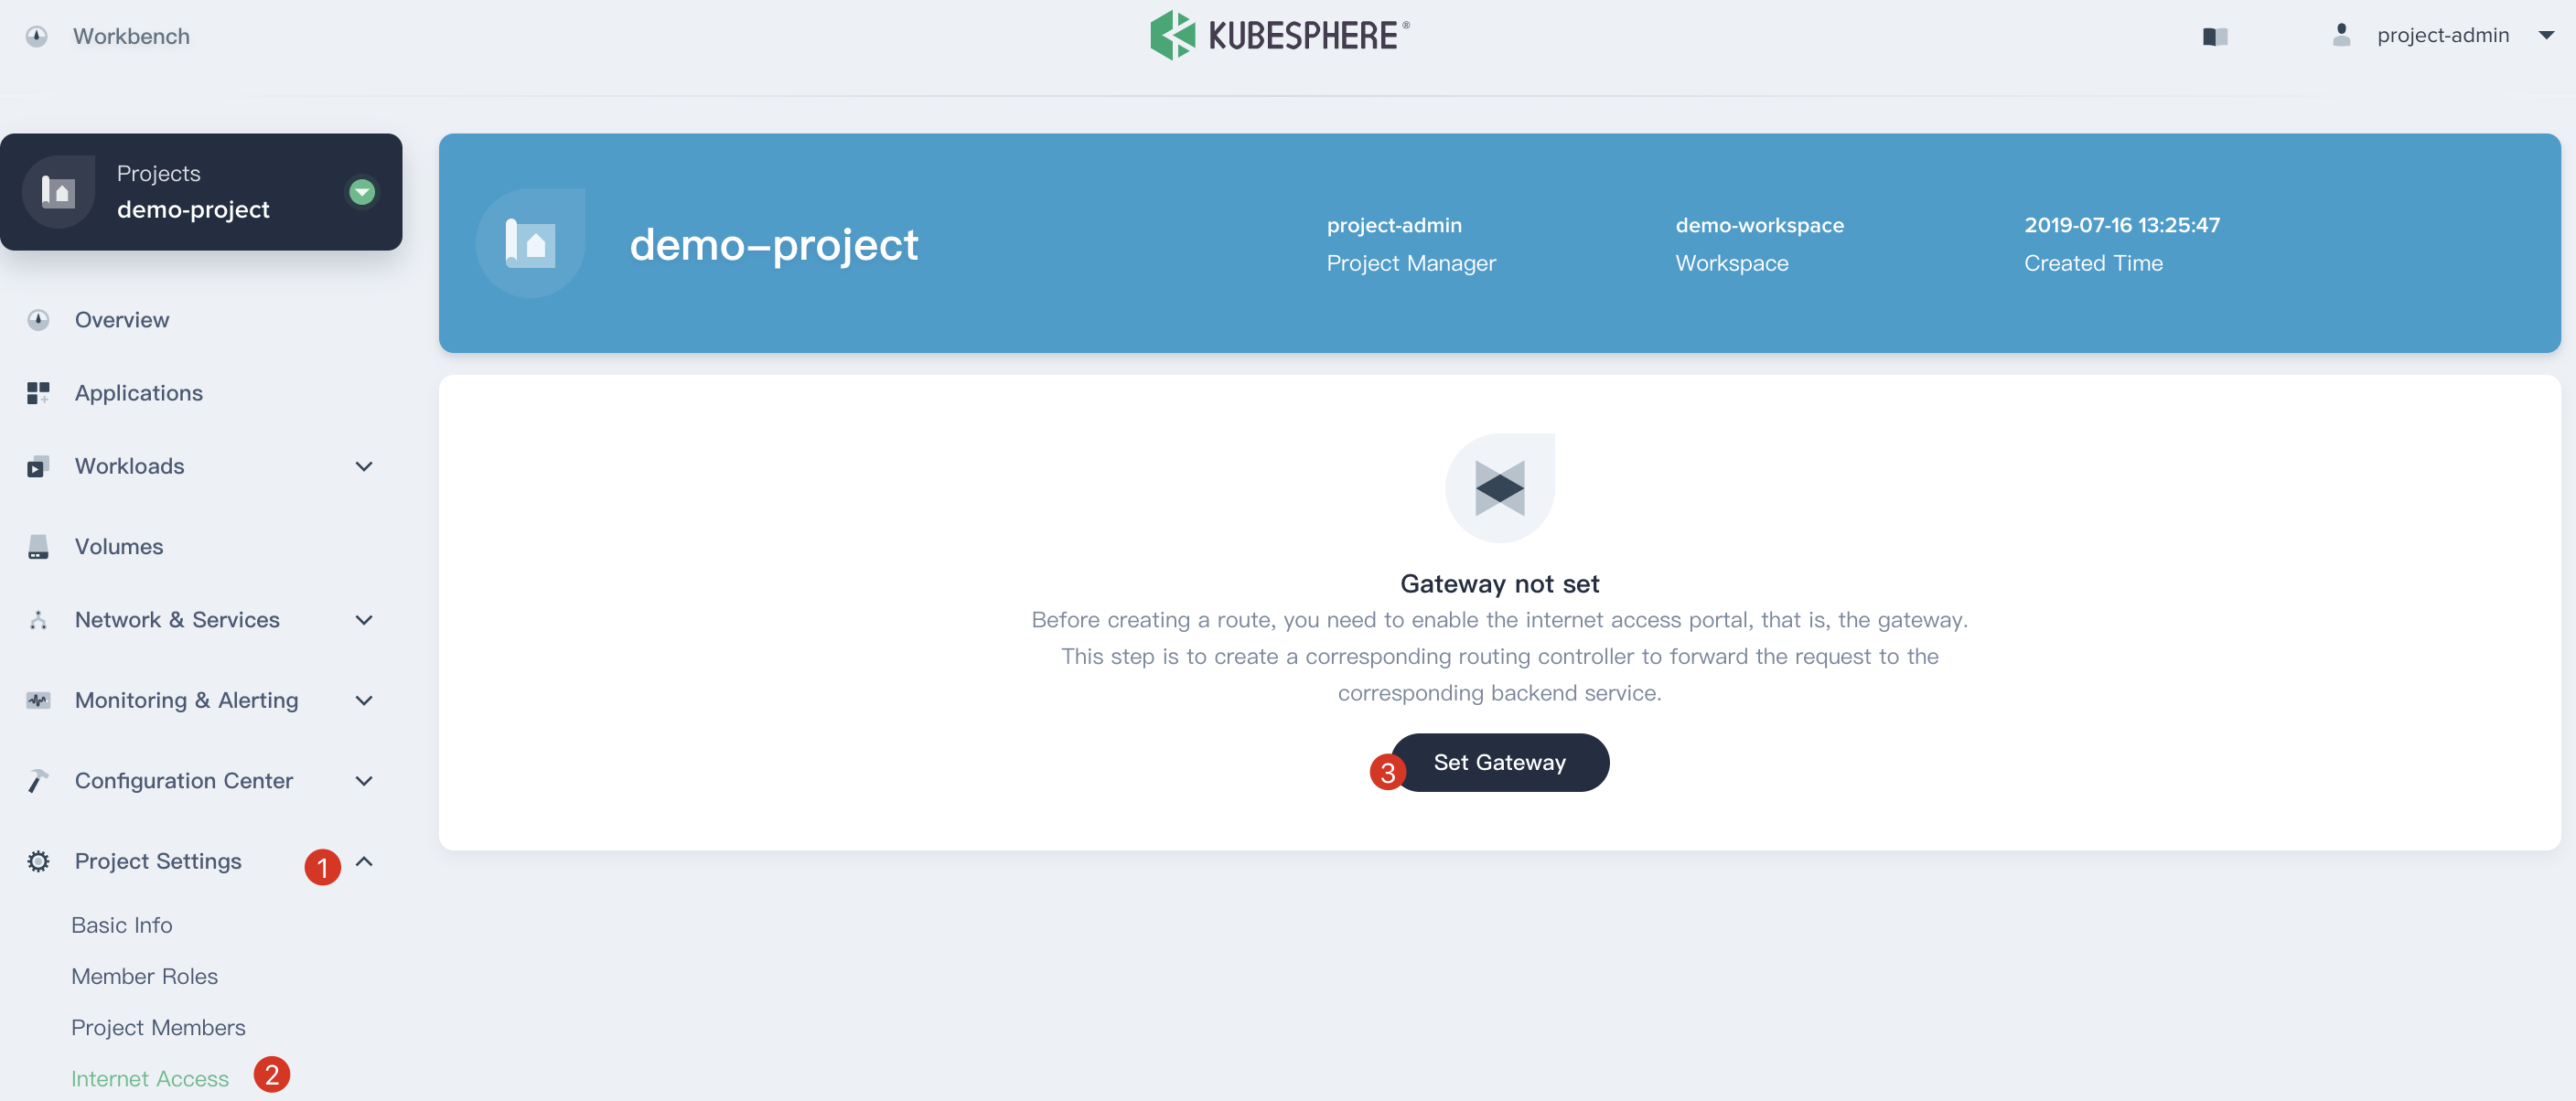
#### Step 4: Set the Gateway
Before creating a route, you need to enable a gateway for this project.
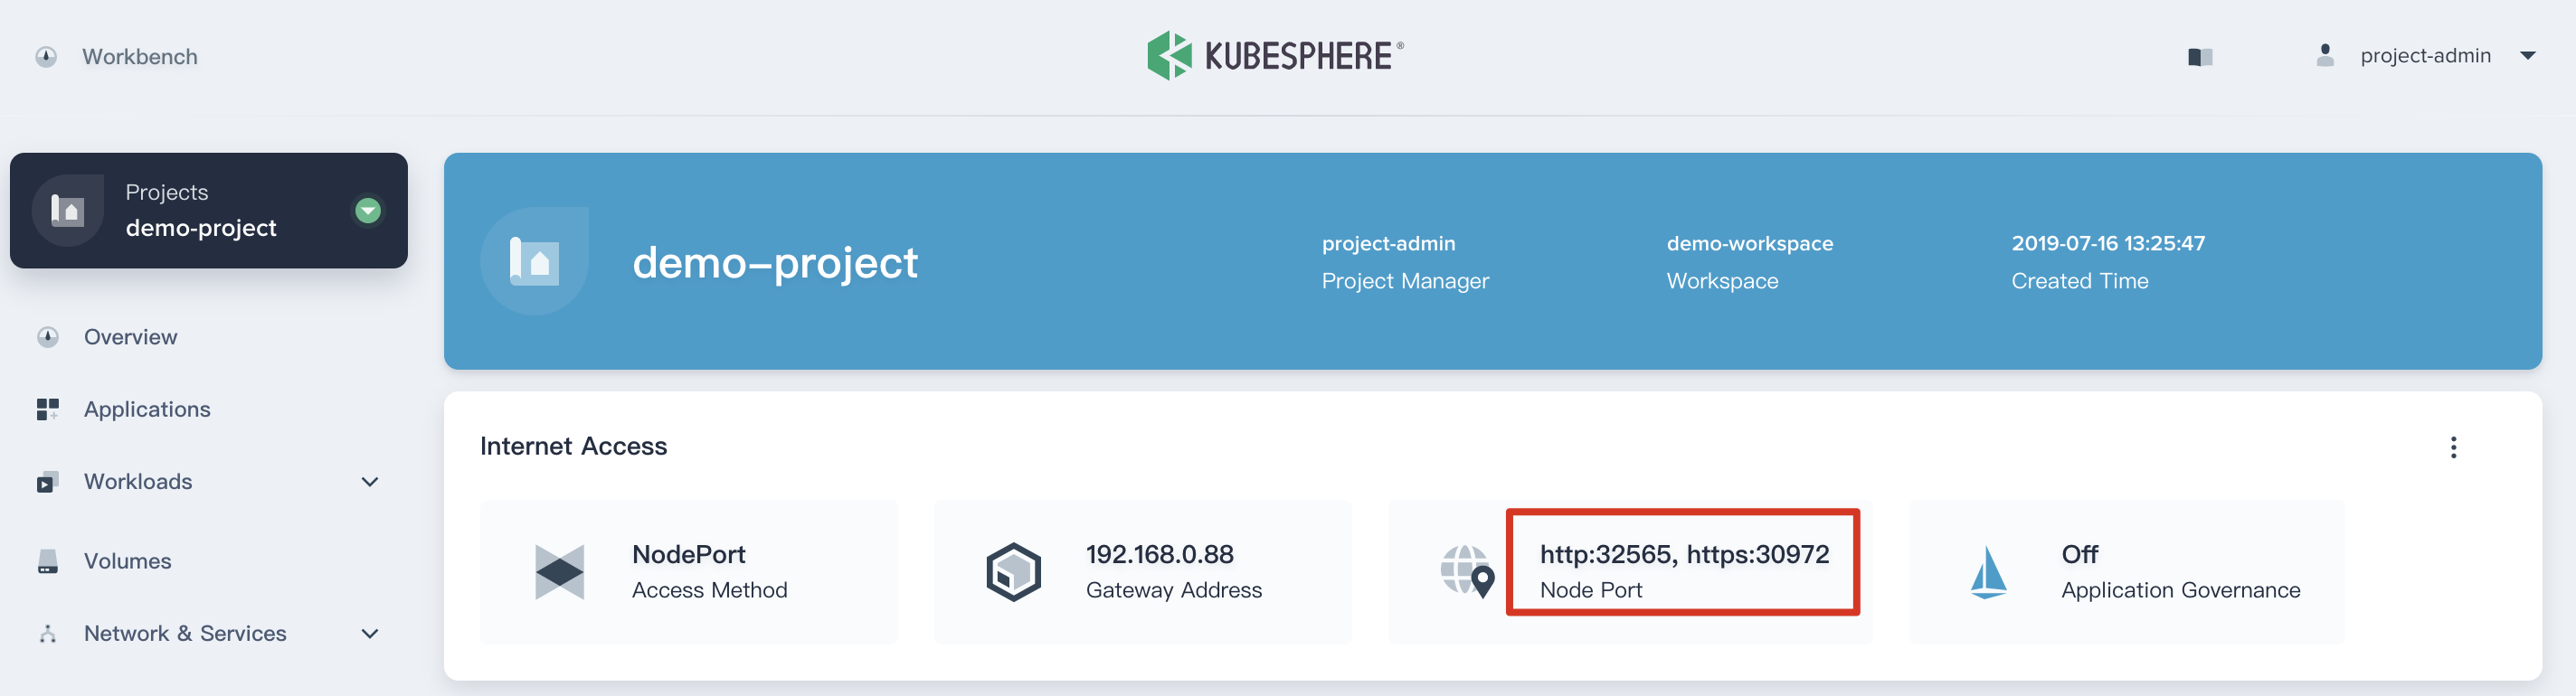
4.1. We still use `project-admin`, Choose **Project Settings → Internet Access** and click **Set Gateway**.
4.2. Keep the access method as `NodePort` and click `Save`.
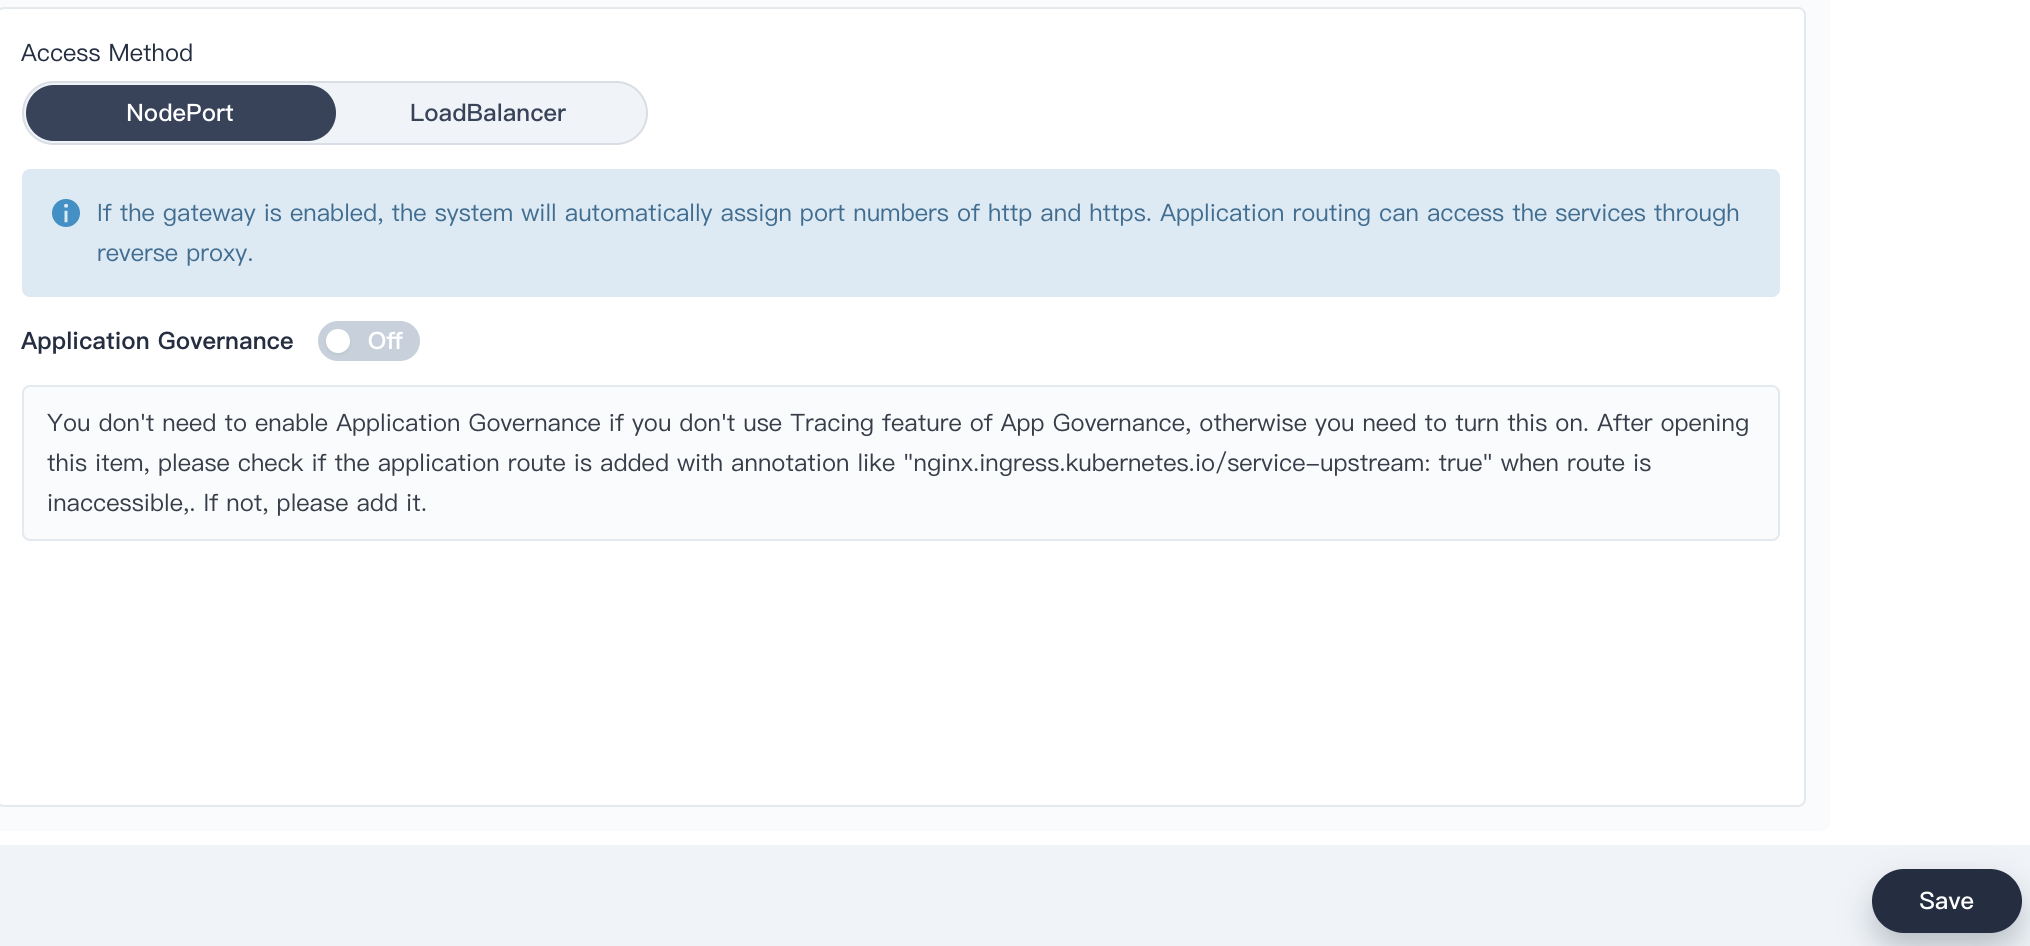
4.3. Now we are able to see the Gateway Address (192.168.0.88), the NodePort of http and https respectively.
#### Step 5: Create DevOps Project
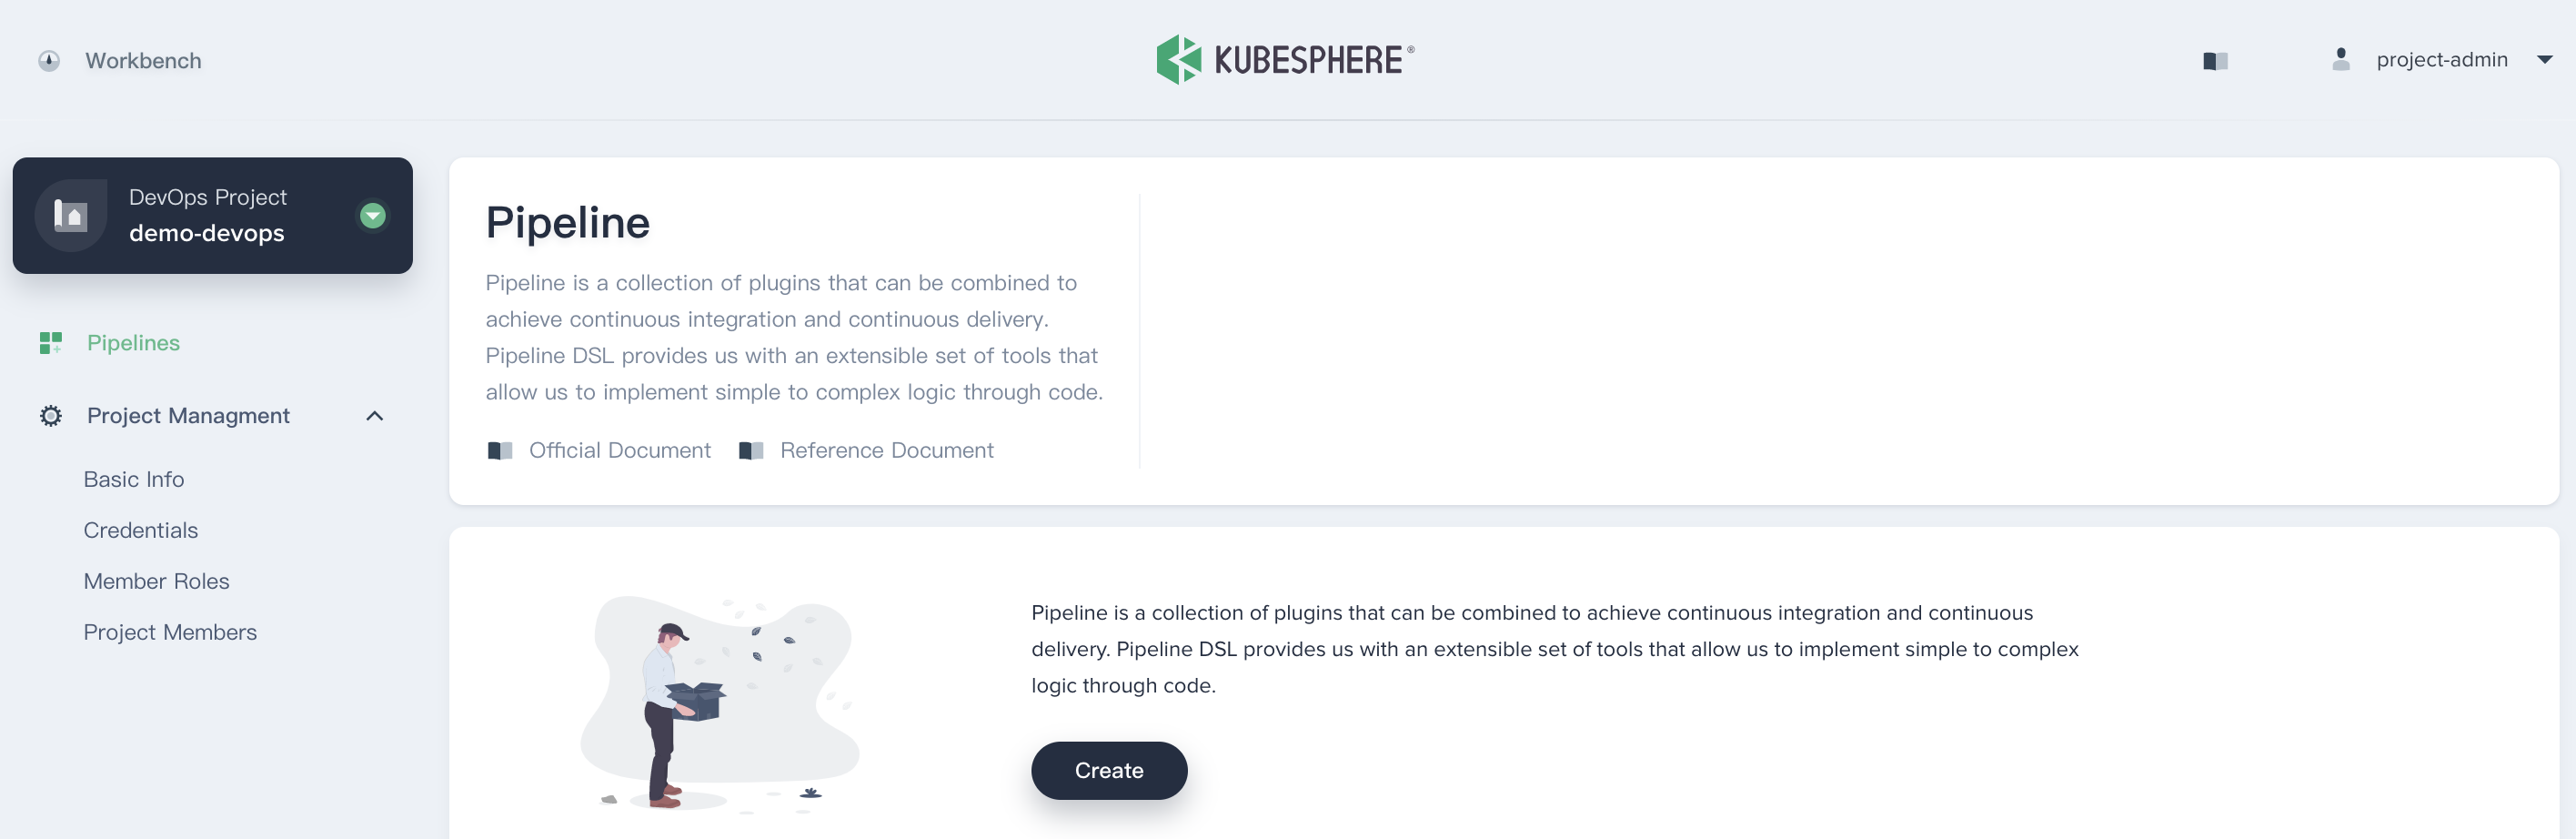
5.1. In this step, click **Projects** and click `Create Project` button, then select **Create a DevOps project**.
5.2. Fill in the basic information, e.g. `demo-devops`, then click **Create** button, it will jump to `demo-devops` page.
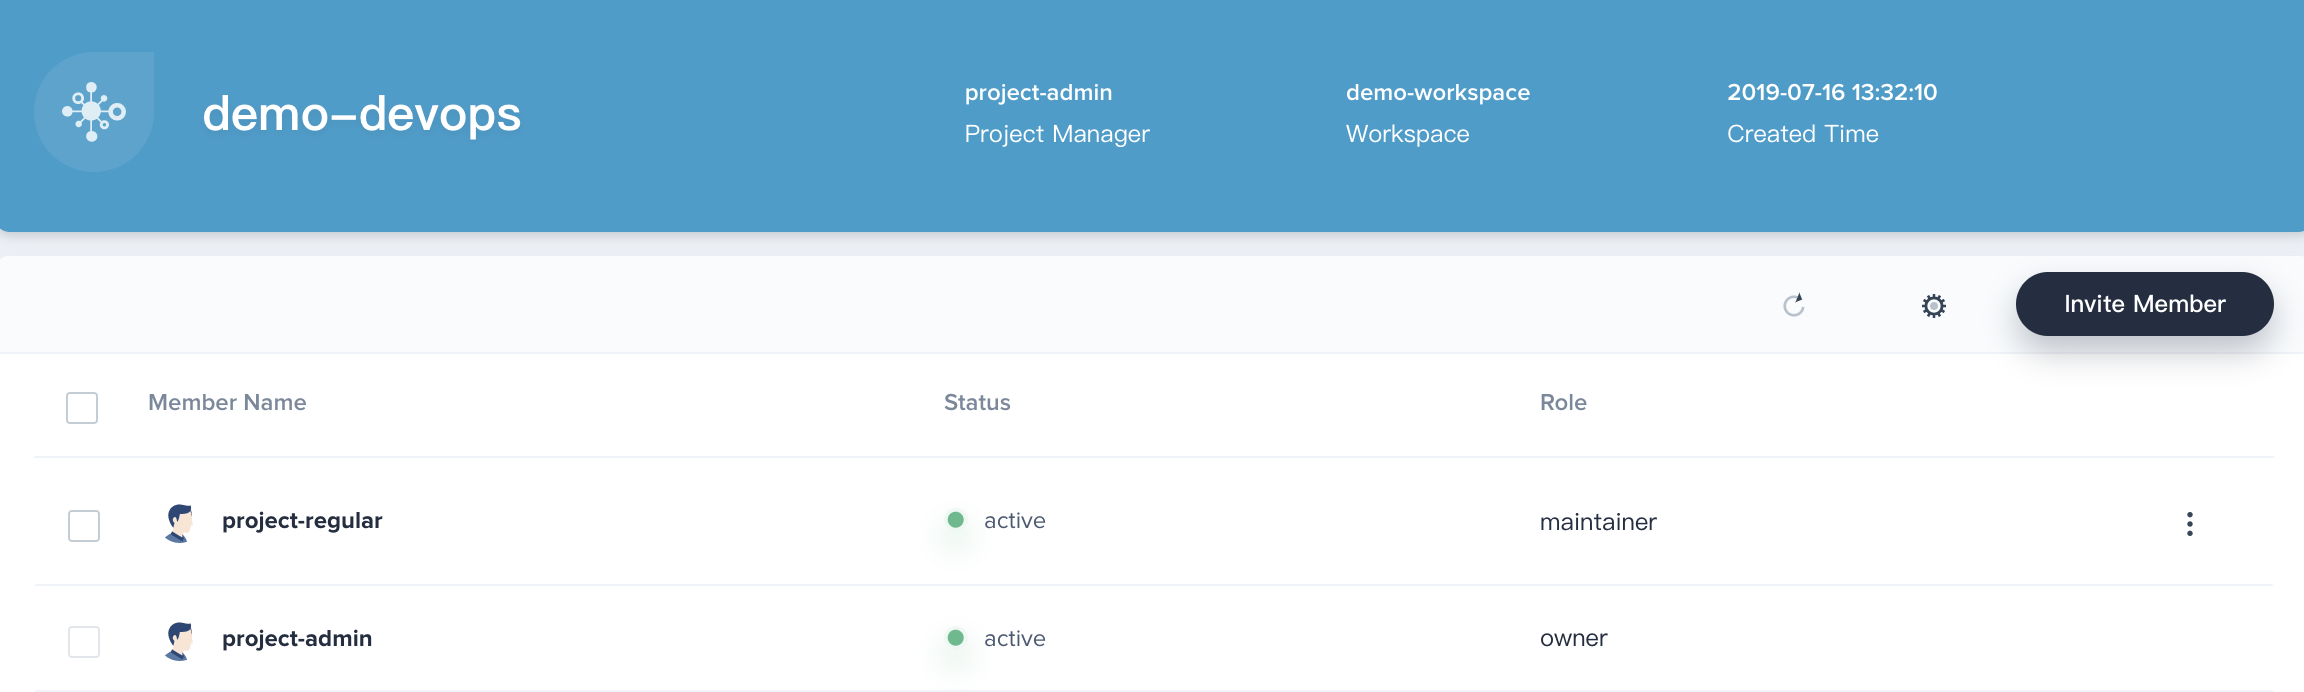
5.3. Similarly, navigate to **Project Management → Project Members**, then click **Invite Member** and grant `project-regular` as the role of `maintainer`, which is used to create pipeline, credentials, etc.
## Next Step
Tutorial 2 - [Expose your App: Create a Service and Ingress](ingress-demo.md).